Alternative Process Tutorials

Alternative Process Tutorial #5
Your First Alt Print
Illustration #45: Cyanotype Photo
Copyright © 1999 by Tom Ferguson
Click on image to view larger
Illustration #46: Cyanotype Photo
Copyright © 2000 by Tom Ferguson
Click on image to view larger
OK, this is finally it, the fun part! You finally get to make a print! These instructions are for printing in sunlight. You can use these instructions with UV tubes, but you may need to increase your exposure times.
Materials needed for this tutorial:
- Coated paper from tutorial #5
- Contact frame or 2 pieces of 1/4 inch glass with safety edges
- Photo chemical tray one size larger than your paper
- Black mat board, larger than your contact frame
- Source of running water
Choose one or more of your existing black and white negatives that print nicely with a #1 or #2 silver gelatin paper or variable contrast filter. In a room with subdued tungsten lighting (see tutorial #3), place the negative emulsion to emulsion with a dry piece of coated paper from tutorial #5 The emulsion of the film is typically the dull side of the film, the emulsion of the paper is the coated area. Place the negative and paper into a contact frame with the film facing up towards the glass (see illustration #51). 4x5 inch and smaller negatives can be put in either a 35mm proofing frame (see illustration #48) or between two pieces of plate glass (see illustration #49). When working larger than 4x5 inch, a spring back, hinged, frame is best. This will ensure best contact between the paper and film, which maximizes sharpness, and allows the frame to be opened to examine exposure (see illustration #50).
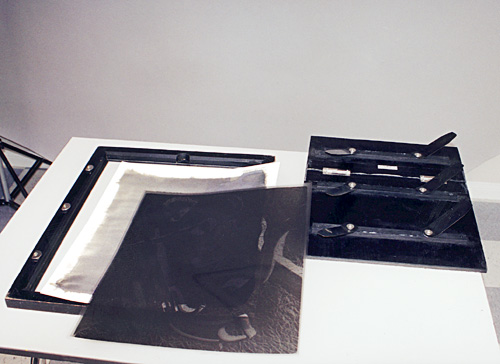
Illustration #47: Neg, Coated Paper, Frame
Copyright © 2001 by Tom Ferguson
Click on image for larger view
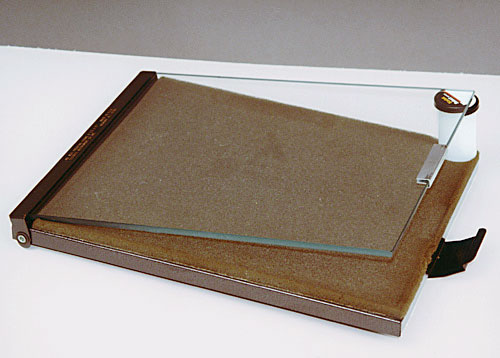
Illustration #48: 35mm Proofing frame
Copyright © 2001 by Tom Ferguson
Click on image for larger view

Illustration #49: Sheet Glass as frame
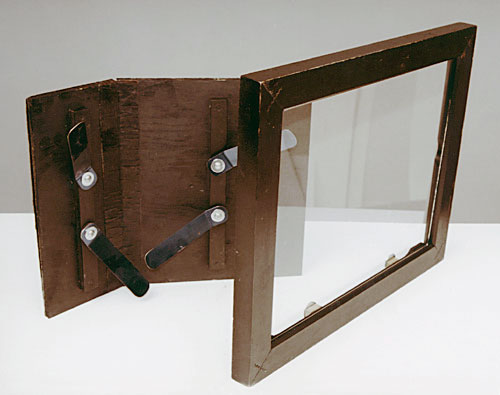
Illustration #50: Hinge back frame
Copyright © 2001 by Tom Ferguson
Click on image for larger view
Next we are going to take the frame outside in the sunlight and make a test strip (see illustration #53). Printing in sunlight is best between 10AM and 3PM on a clear day. A test strip is a series of exposures all on one sheet. When the sheet is "developed", you can find the exposure strip that is most pleasing. This strip's time will then be used for the next exposure. I do not like doing test strips. They take too long, and you don't get to see the entire image at any given exposure, just a slice of it. As this series of tutorials progresses, I will show you how to "measure" your negative and use this measurement to determine your first print time without the test strip.
But, for now, place a piece of black mat board over the top of your contact frame with your negative and coated paper. Place this in direct sunlight, and using a watch or timer, remove the mat board and expose for 3 minutes. At the end of this 3 minutes, cover 1/5 of the negative with the black mat board and continue to expose for another 1 and 1/2 minutes. You now have a stripe 1/5 of the negative exposed for 3 minutes, and 4/5 of the negative exposed for 4 and 1/2 minutes (the first 3 minutes plus the second 1 and 1/2 minute). Next, move the black mat board so that 2/5 of the negative is covered and continue the exposure for another 1 and 1/2 minutes. Next, move the black mat board so that 3/5 of the negative is covered and continue the exposure for another 1 and 1/2 minutes. Finally, move the black mat board so that 4/5 of the negative is covered and continue the exposure for the final 3 minutes. You now have expose test strips of 3, 4:30, 6, 9, and 12 minutes. A typical exposure, in Southern California, is 6 minutes. This varies significantly due to the exposure your negative received, the location you are printing at, and the time of year, and your choice of papers.
"Development" is by water only. Wash the print in gently moving water (68 to 75 degrees F) for 12 minutes. Wear your gloves, as there are chemicals in the wash water. If all of the strips on your test are too light, double the time's I've given and try again. If all of the strips on your test are too dark, half the time's I've given and try again.
Once completely dry (a fan or hair drier on medium will speed up the drying process), choose the strip that appears correct, then expose a full sheet of paper. You now have a truly "handcrafted" photograph. A note about drying, cyanotype (and most alt processes) have a problem called "dry down". This means that the look of a dried print is significantly different than a wet print. The dark values of a just "developed" print will continue to deepen until the print is dry (and even for hours beyond that time). You need to judge dry, not wet, prints.
A couple refinements that may help your future printing sessions. Some papers do not print a very deep tone, the blacks (dark blues) are rather weak. These papers are often helped by "double coating" the paper. After the first coating is dry, simply re-coat and dry a second time. This will change both the contrast and print time of the paper. Some locations have alkaline water supplies that interfere with the cyanotype process. If you have trouble, try mixing the "A" and "B" solutions with distilled water, and "pre-developing" in a tray of tap water with 10 to 30ml of acetic acid (pure stop bath, not "indicator stop") per liter of water for 5 minutes. Then complete development in running tap water for the final 7 minutes.
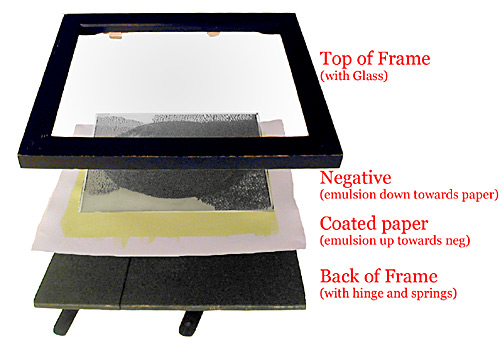
Illustration #51: Item placements
Copyright © 2001 by Tom Ferguson
Click on image for larger view
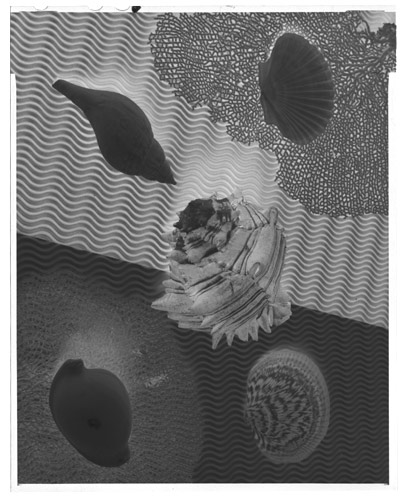
Illustration #52: Negative used
Copyright © 2001 by Tom Ferguson
Click on image for larger view
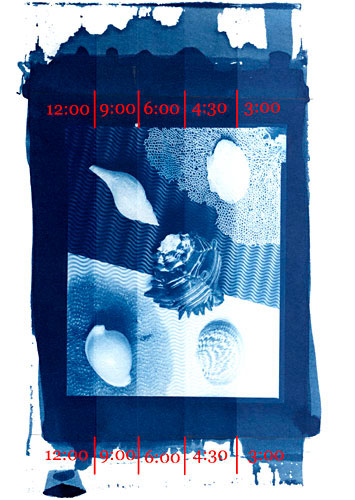
Illustration #53: Test strip
Copyright © 2001 by Tom Ferguson
Click on image for larger view
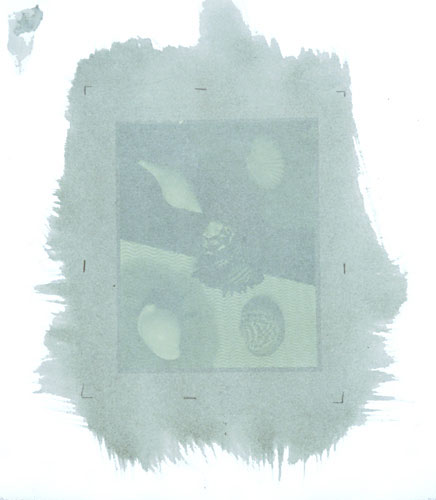
Illustration #54: Exposed printout image
Copyright © 2001 by Tom Ferguson
Click on image for larger view

Illustration #55: Developed image
Copyright © 2001 by Tom Ferguson
Click on image for larger view
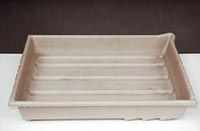
Illustration #56: Photo Chemical Tray
Copyright © 2001 by Tom Ferguson
Below are some suggested personal film speeds and development times if you want to start shooting negatives optimized for cyanotype prints. Developer used is Kodak HC-110. You will get far better results from doing your own testing! I will explain how to determine your own personal Film Speed in tutorial 9, how to determine your own personal development time in tutorial 10, and what plus and minus ranges are used for in tutorial 18.
HP 5 Plus (film) and HC-110 (developer): For Cyanotype:
RANGE |
FILM |
DEVELOPER |
DEVELOPER |
LAB |
| Minus 1 | 125 | 4:00 | 25ml per liter | Pull one stop |
| Normal | 125 | 5:00 | 30ml per liter | Normal |
| Plus 1 | 160 | 8:00 | 40ml per liter | Push one stop |
T-Max 400 (film) and HC-110 (developer): For Cyanotype:
RANGE |
FILM |
DEVELOPER |
DEVELOPER |
LAB |
| Minus 1 | 125 | 4:15 | 25ml per liter | Pull one stop |
| Normal | 125 | 5:15 | 30ml per liter | Normal |
| Plus 1 | 160 | 7:45 | 40ml per liter | Push one stop |
The above assumes Crains Platinotype Paper and sunlight or type 350 bulbs. Other papers or light sources WILL change data.
The look of cyanotype is truly unique. I don't think simply looking at one cyanotype print is enough. It's too removed from our modern standards. Work with the process a while, experiment. I find cyanotype exciting when used in photograms. How about night photography? Find what images, if any, work in cyanotype for you. Remember that people only care about the process used in creating art for a moment or two. To hold their attention longer, the image and the process must work together.
Click the "next" link below and we will continue our look at the zone system.